


Shrinky Dinks Pin Tutorial
I've made Shrinky Dinks pins with my kids before. We used the clear sheets and traced images that we had put underneath the sheets. They turned out cute but I didn't like that they were translucent. I also wasn't happy that we couldn't do more detailed designs because you can't draw very precisely with a marker. So I decided to try something else - white Shrinky Dinks and vinyl stencils.
It's easy and lot's of fun! 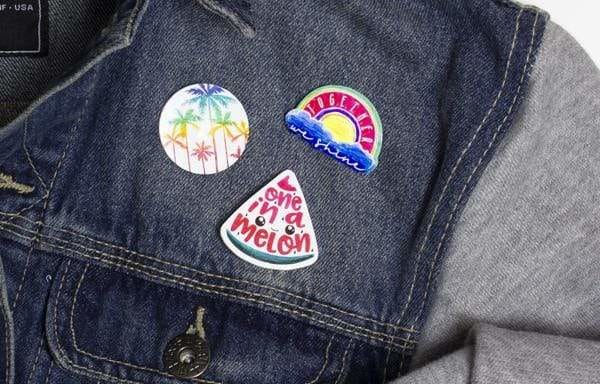
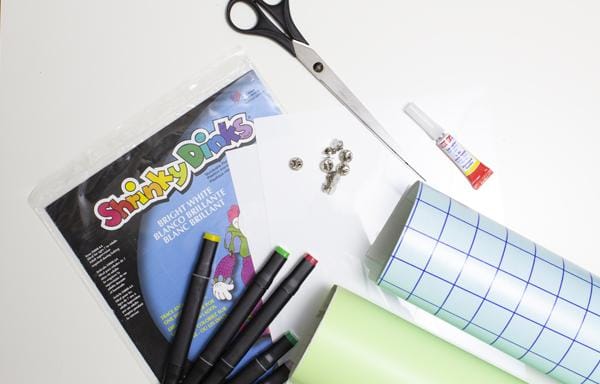
This is what you'll need
Vinyl (I used Oracle 631)
Transfer tape
Shrinky Dinks (Bright White)
Permanent markers (I used alcohol ink markers)
Scissors
Pins
Glue (I used super glue but E6000 works great, too)
Prepare the vinyl stencil
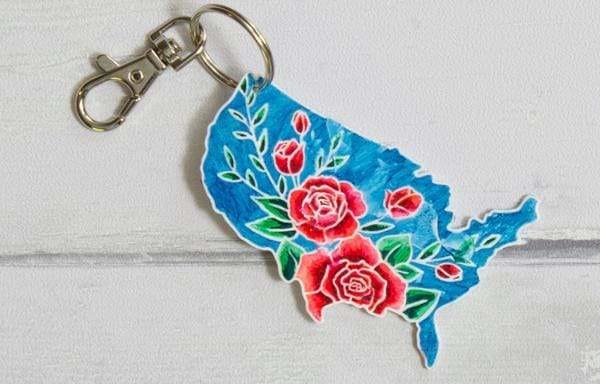
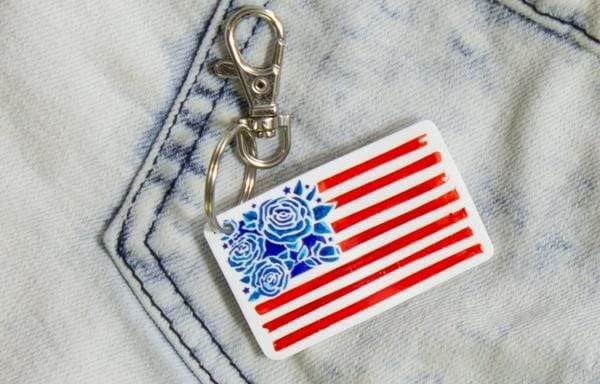
First things first, you want to pick a design that works well. You don't want it to be too detailed. Symmetrical designs are not my favorite choice because Shrinky Dinks don't shrink completely proportional. That means circles will look slightly like an oval. It's not bad but I'm a perfectionist and possibly a little OCD. ;-) If you pick a design that has an organic outline you won't be able to tell that they didn't shrink perfectly proportional.
I cut mine about 3 inches wide. The finished pins will be about an inch and 1/4". Shrinky Dinks instructions have a ruler that shows you how much the plastic will shrink.
Remember not to weed the parts that you want to stay white. The vinyl stencil should look like the opposite of what you want in the end. 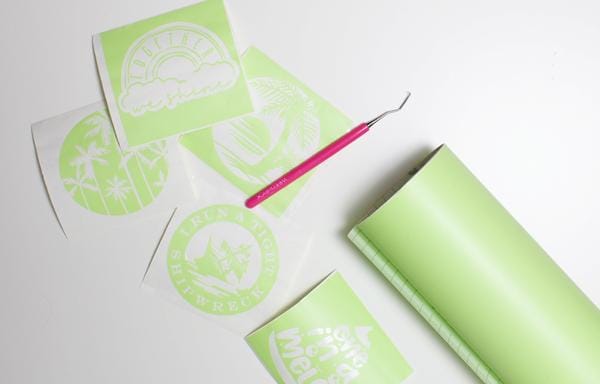
Apply the stencil
Apply your transfer sheet and put the vinyl on your shrink plastic. By the way, both sides of the plastic sheet are the same. 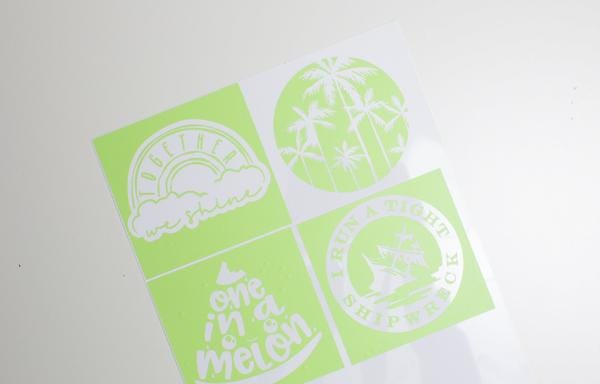
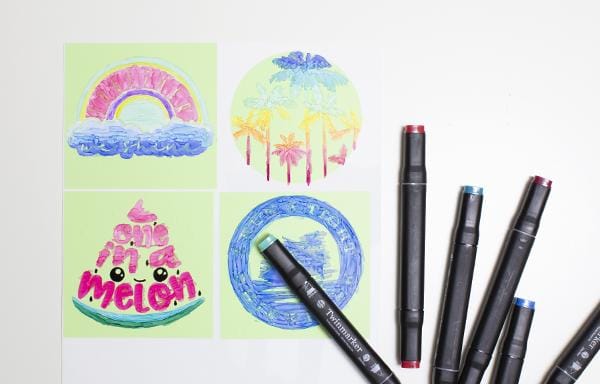
Color in the stencil
You need permanent markers, not much else will stick to the glossy surface of the white shrink plastic. I used alcohol markers, they worked pretty good. Keep in mind that the colors will get a lot darker as the plastic shrinks. If your stencil is applied well the ink won't bleed. Don't worry if the ink looks a bit uneven, you will hardly be able to see those imperfections on the finished pin.
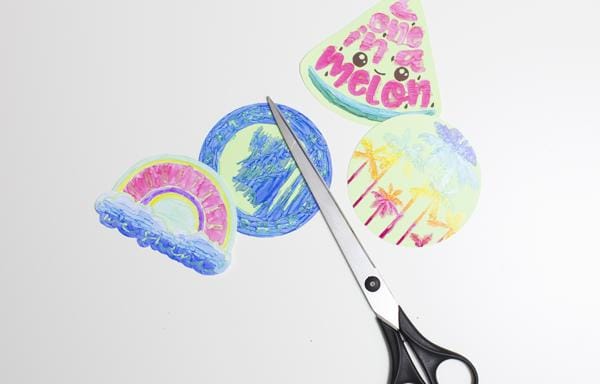
Cut the plastic
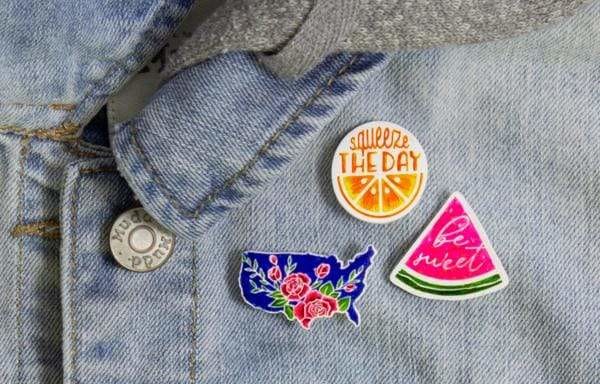
When the ink is dry you can cut the plastic with scissors. You can either cut right on the designs outline or cut with an offset so it will have a white boarder (I did this with the watermelon design). Try not to touch the ink, it might smear.
Remove the stencil
This is probably the trickiest part. You have to try to remove the vinyl without touching the ink. 
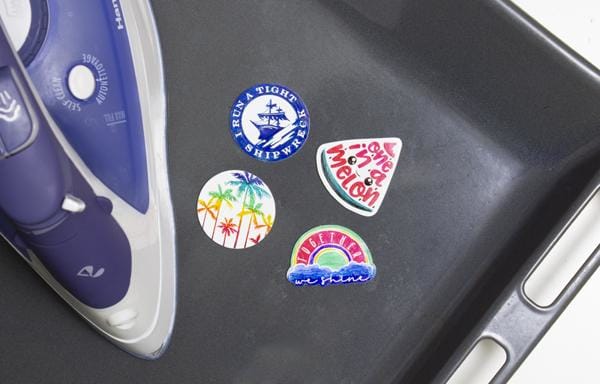
Shrink the plastic
Preheat your oven (check the instructions of the shrink plastic for the recommended temperature) and get your iron out. Don't heat it up, you just need it to apply pressure to flatten the plastic after you take it out of the oven.
Lay the plastic with the painted side up on a baking sheet and put it in the oven. The plastic will curl up as it shrinks. After a little while it will uncurl and flatten on it's own. When it's done, take it out of the oven and press it with the iron if it is not completely flat. You only have a few seconds before it hardens.
Apply the pin
Let the plastic cool down and apply the pin. I used super glue because patience isn't my strong suit. ;-)
And voila, your pins are ready. I don't seal mine and they are holding up fine.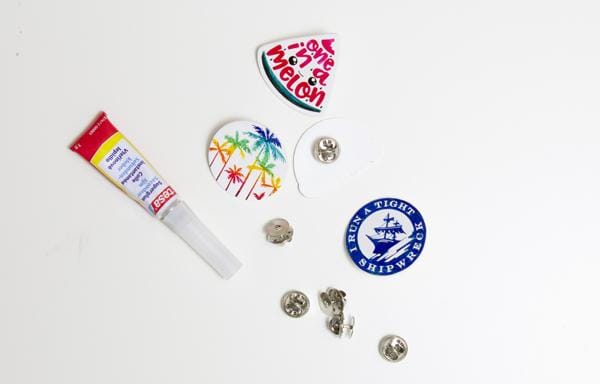
I hope you enjoyed my tutorial and will have fun making your own pins. You can make key chains, too. I would love to see what you create!
-Sabine


Add a comment