


Tissue Box Tutorial
It’s that time of the year when everybody is sniffling and sneezing. Boring tissue boxes are sitting around everywhere. They ARE useful but not exactly appealing. Why not showcase these little papers in a gorgeous tissue “box” that's totally customizable!
This is what you will need:
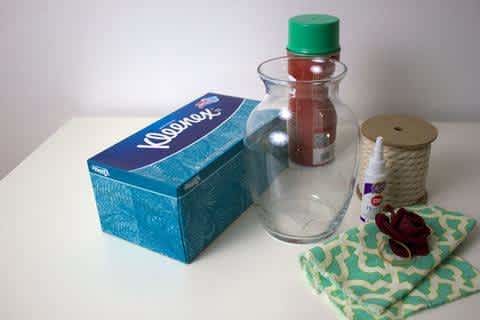
- Vase/Jar (We used a Jardin Glass Vases 7” from Dollar Tree)
- spray paint
- vinyl decal link to "God Bless SVG"
- fabric
- Stop fraying fabric adhesive
- rubber bands
- rope
- fabric flower
- paper tissues
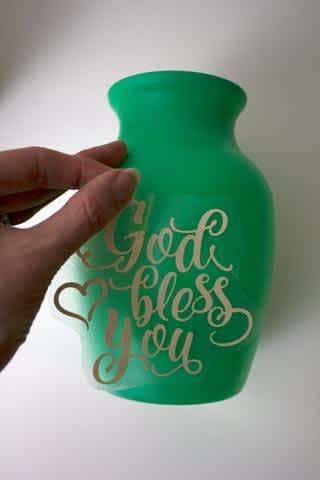
Start with spray painting your vase. Let it dry for 24 hours before you apply your vinyl decal. We suggest using permanent vinyl like Oracal 651. If you have never applied vinyl to a curved surface you can check out our tutorial here.


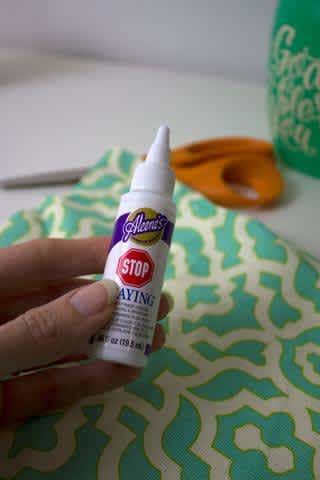
Cut your fabric 8 x 8 inches. Fold it in half and make a 1/2 inch cut in the center. Fold it the other way and do the same. This will leave an “X” in the center of your fabric (each cut is going to be about 1" long). Seal the sides of the fabric and the center cuts with some “Stop Fraying” fabric adhesive and let it dry.
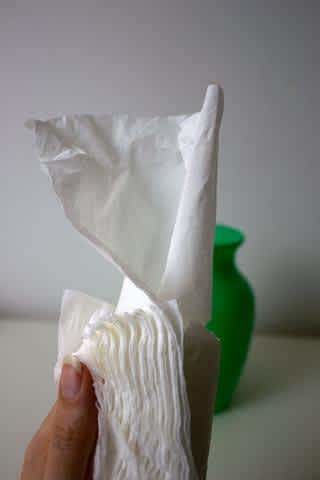

Open the paper tissue box and carefully take out about 1 inch worth of tissues.
Unfold the one on top so it sticks out. Roll them up and stick them into your vase.
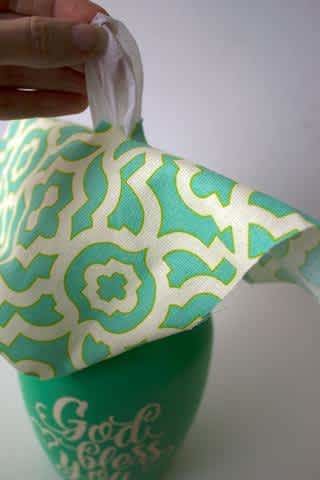
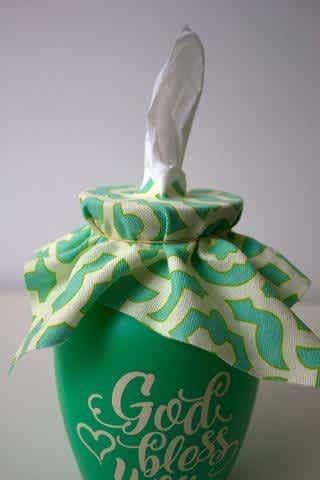
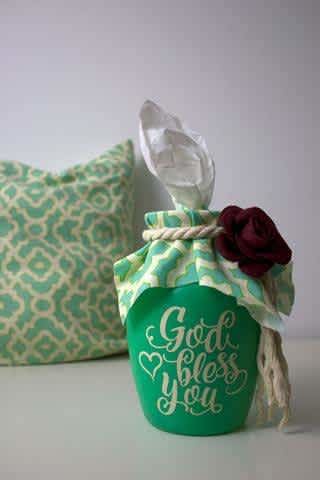
Pull the top tissue through your fabric and secure the fabric with a rubber band
around the neck of the vase.
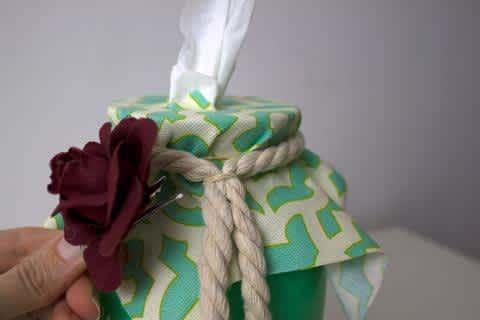
Now it’s time to decorate. Use some rope to cover up the rubber band and secure
it with another so it can be easily removed when it’s time to refill the tissues. Add a pretty flower or another lovely little eye catcher. We used one with a clip because again, it’s easy to remove.
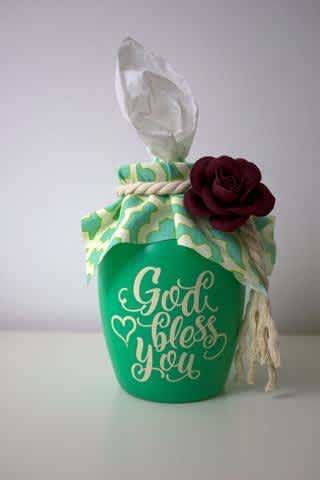
There you have it. This will make a beautiful and uplifting gift for family, friends and coworkers.


Add a comment